The following should help you create a Digital ID in Acrobat and sign a document with Adobe Reader DC. We have adapted these instructions from Adobe's support article and attempted to simplify them. You can reference Adobe's instructions with the following link if something in our condensed steps is not clear. https://helpx.adobe.com/acrobat/using/digital-ids.html
Creating a Digital ID/Signature in Acrobat
- Open Adobe Acrobat and navigate to 'Edit' at the top. Click on 'Preferences'.
- Under Categories, click on 'Signatures'. Click 'More' next to 'Identities & Trusted Certificates'.
- Click 'Add ID'.
- Select ‘A new digital ID I want to create now'. Click Next.
- Select 'New PKCS#12 digital ID file'. Click Next.
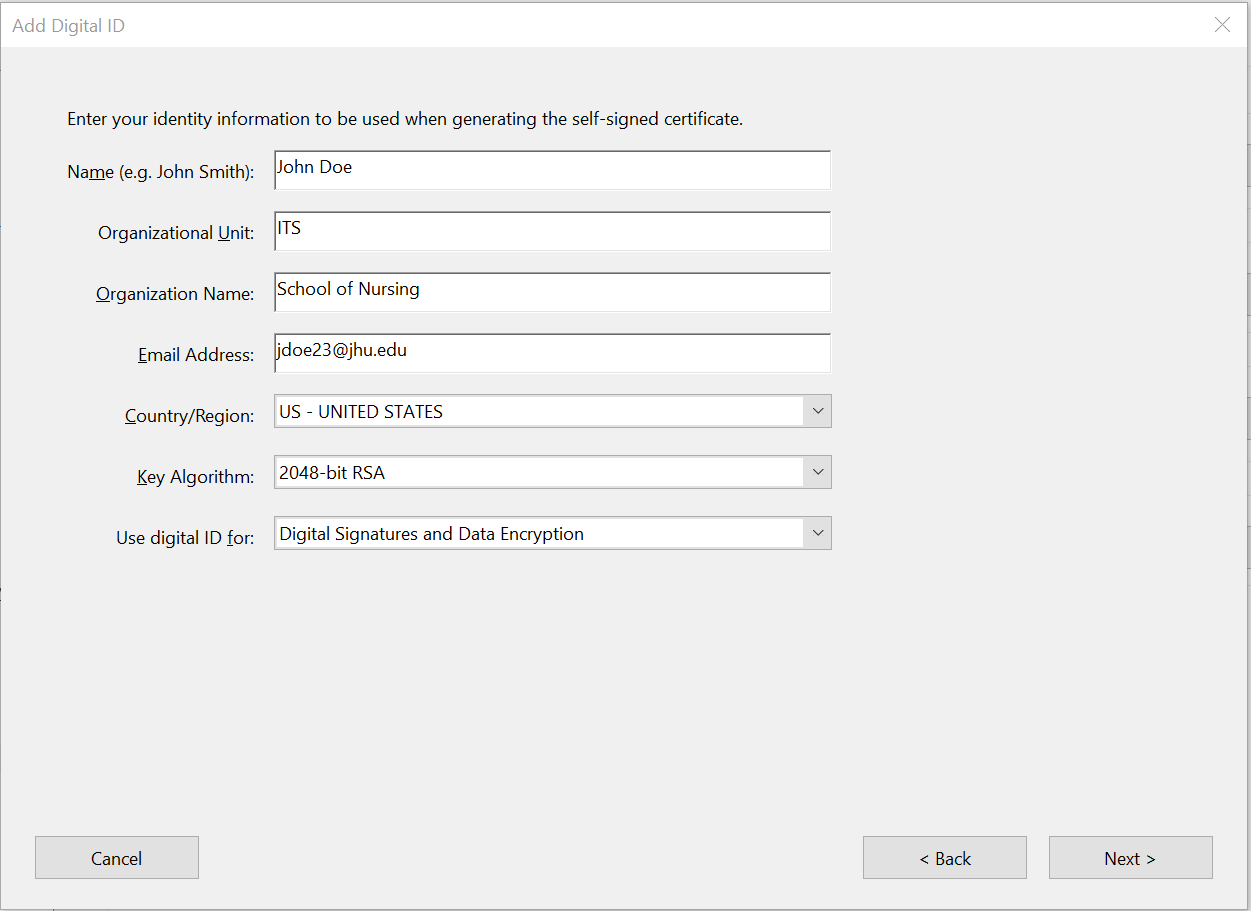
- Enter your identity information to be used when generating the self-signed certificate. Click Next.

- Do not change the 'File Name' path. Enter a 'Password' for your Digital ID and click 'Finish'.
Signing a PDF with a Digital ID/Signature
- Open the PDF file that requires a digital signature.
- Click on 'Tools' and select 'Certificates'.
- Select 'Digitally Sign'. In the document, left click and drag out the area of the document where you would like the signature to appear. Click 'Sign'.
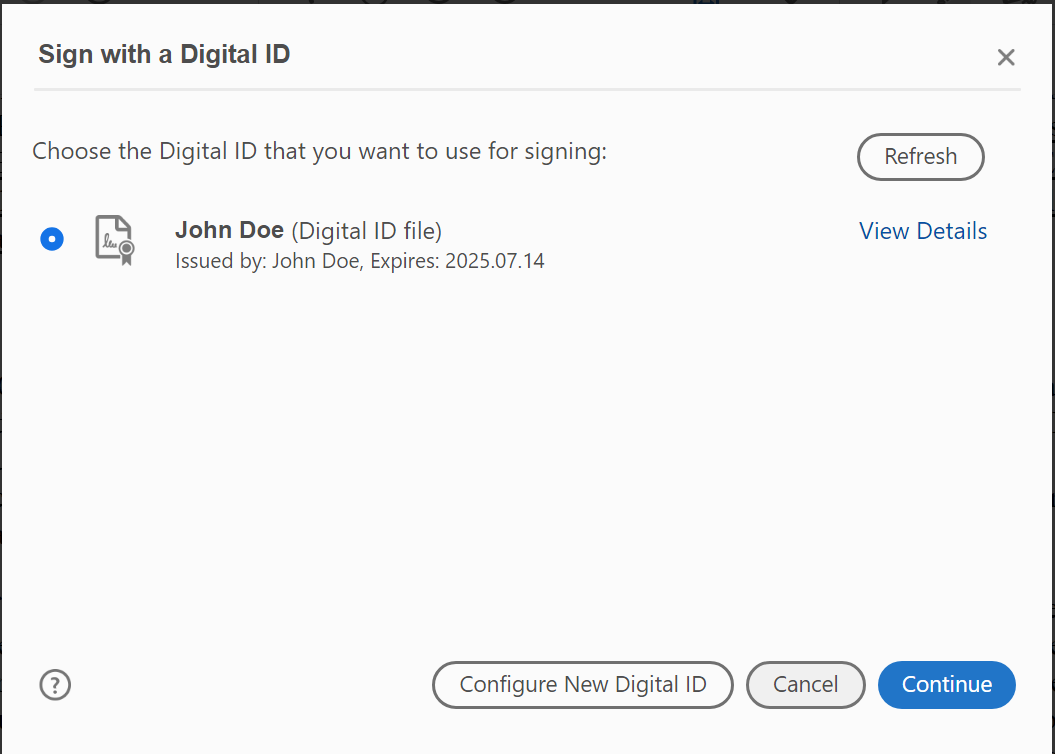
- Choose the Digital ID that you want to use for the signing. Click 'Continue'.

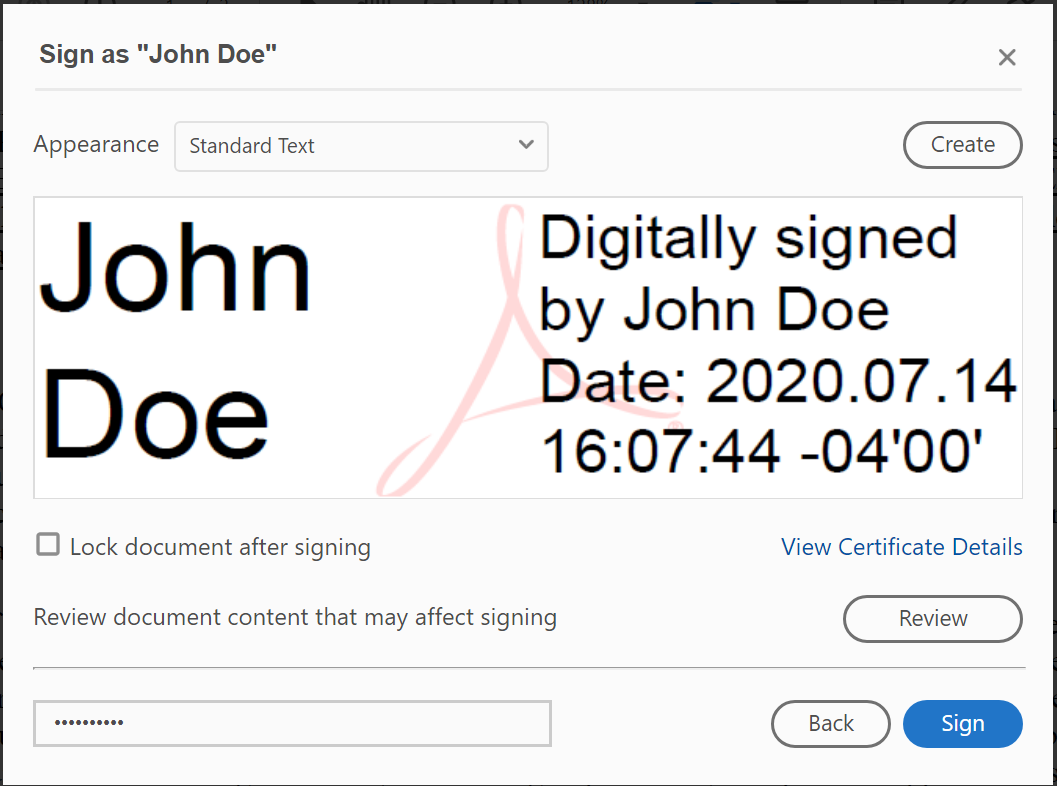
- Enter the password for the signature. Click 'Sign'.
IMPORTANT - If you want to ensure there are no changes made to the document after you sign it, make sure you select the "Lock document after signing" check box.

- Save the document.
Related articles
Related articles appear here based on the labels you select. Click to edit the macro and add or change labels.


