...
Download and Install the Printer Software
- For Version 10.6 - 10.9 Systems click on link to dowload the needed files MAC_OSX_10.6_10.9.zip
- For Version 10.5 and 10.4 STOP and contact Centric Printer Support
- Centric Printer Support
- Email: jhsph@centricbiz.com
- Phone: 410-902-3310
- Open the Downloads Folder and select the Popup.dmg file you downloaded
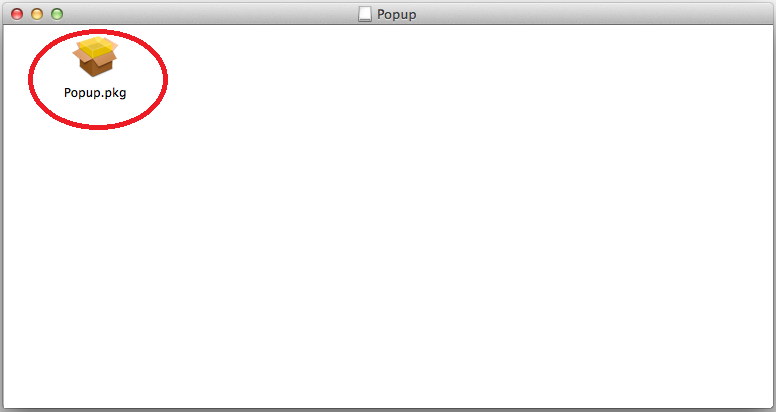
- Open "Popup.pkg"
- NOTE: If you receive the error warning "App can't be opened because it is from an unidentified developer"
- control-click the application and choose “Open”
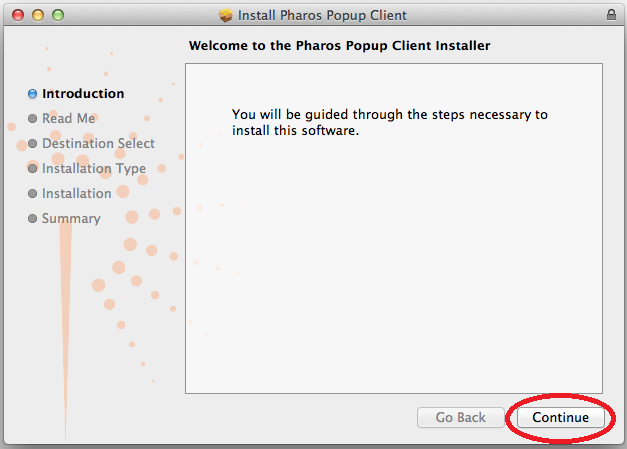
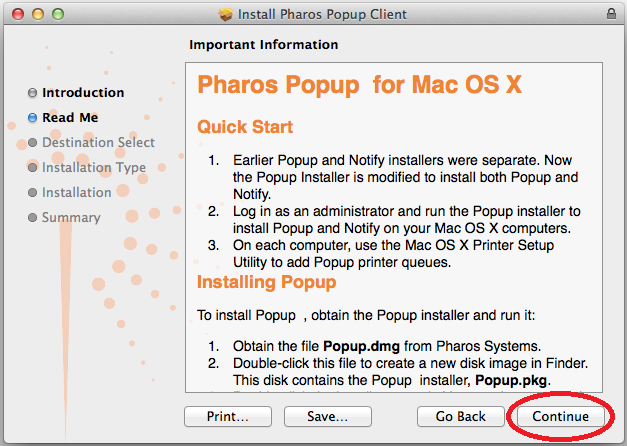
- Select Continue
- Select Continue
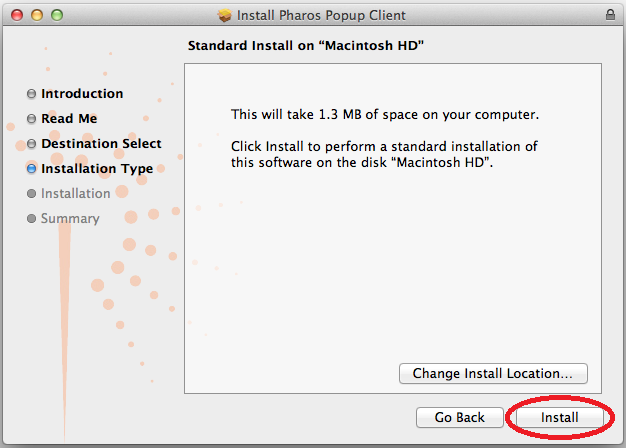
- Select Install
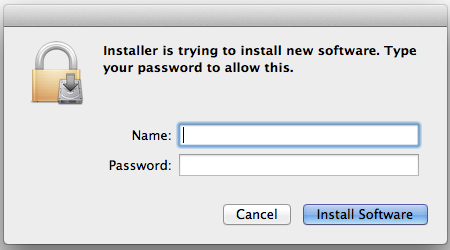
- Provide Username and Password to local machine if needed
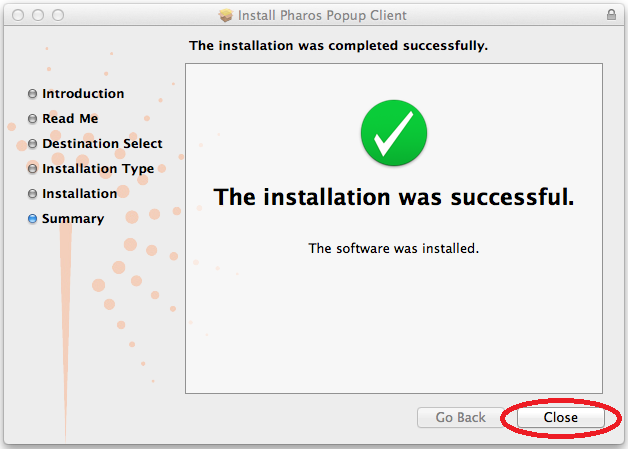
- Select Close
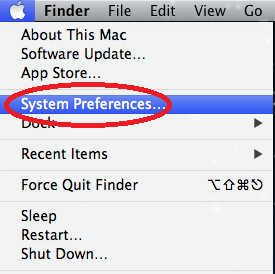
- From the Apple icon select System Preferences
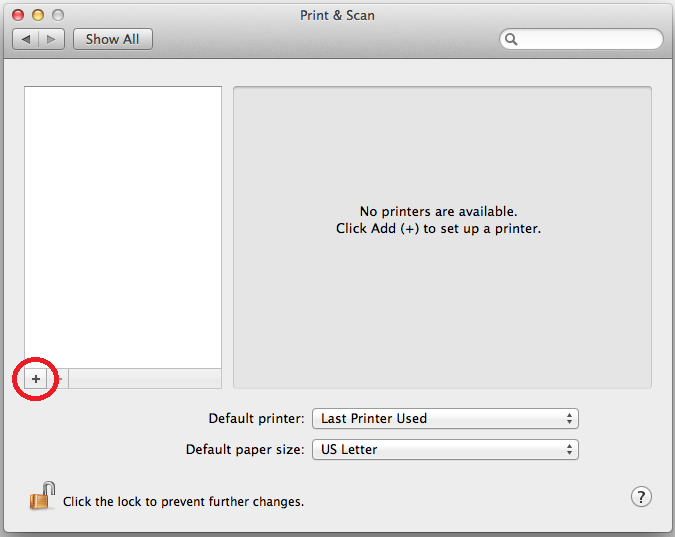
- Select Print & Scan

- Select the “+” button to add new printer select Add Printer
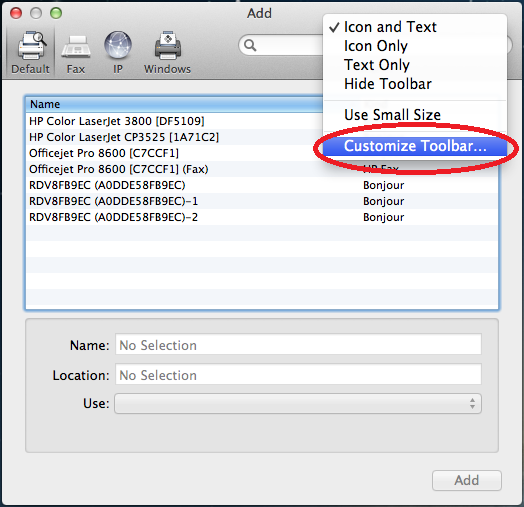
- Hold down the <Control> key on the keyboard as you click anywhere on the toolbar. A popup menu will appear where you will select Customize Toolbar
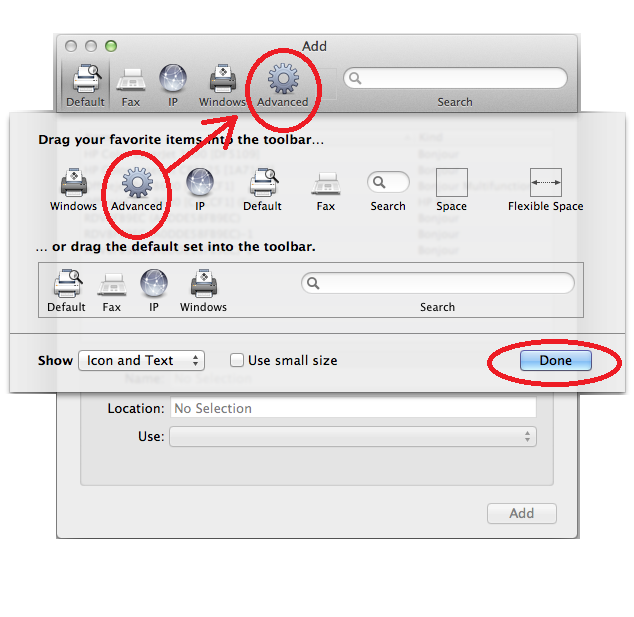
- Drag the Advanced icon to the toolbar and then select Done
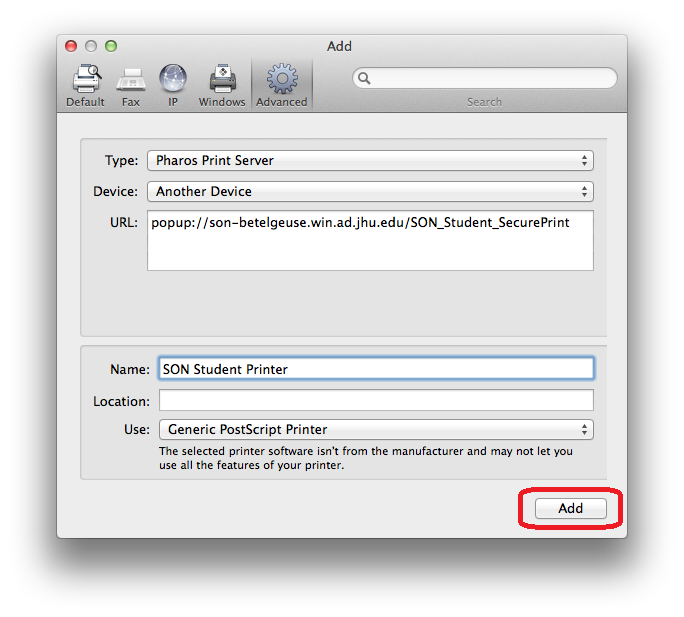
- Click on the Advanced icon and change Type to Pharos Print Server
In the URL field, enter the correct address for the Pharos Printer Server. The address should be: Popup://son-betelgeuse.win.ad.jhu.edu/SON_Student_SecurePrint
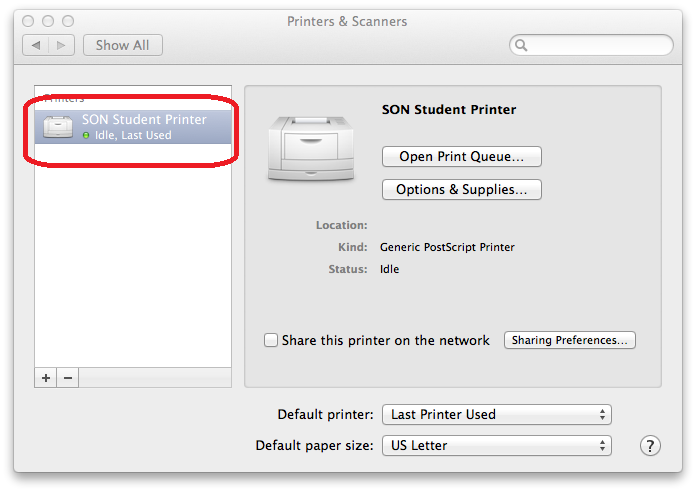
- Set the Name to SON Student Printer
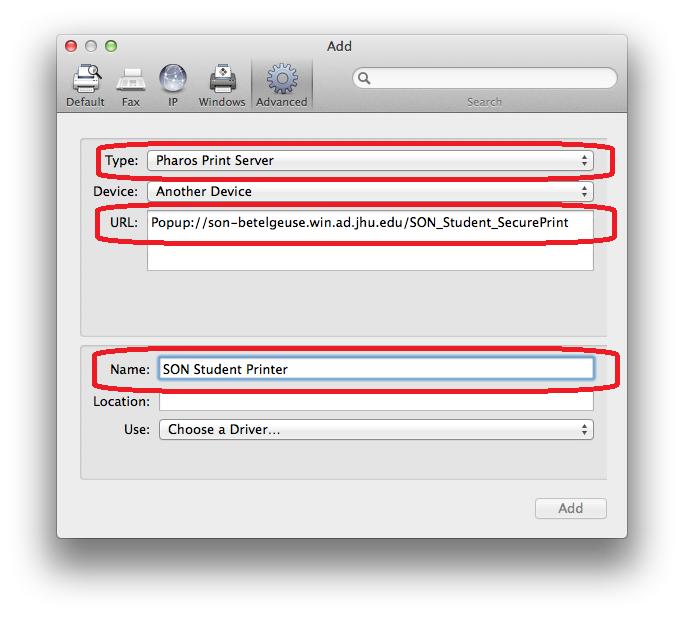
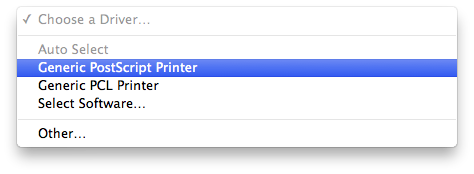
- In the Use field, choose Generic PostScript Printer
- Select Add
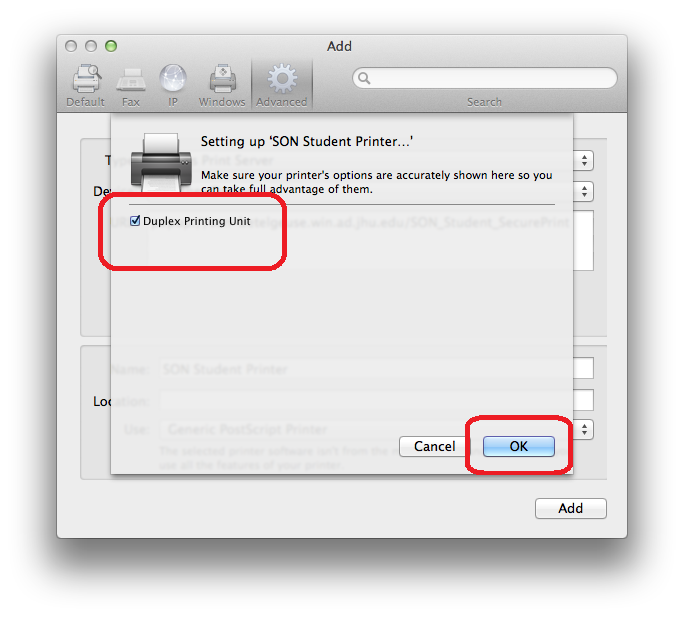
On the next screen enable the Duplex Printing Unit. Then click OK.
The Printer has been installed: SON Student Printer
- Instructions on how to print and retrieve print jobs can be found here: SON Student Printing Instructions