Macintosh OS X Instructions
Download and Install the Printer Software
- For Version 10.6 - 10.9 Systems click on link to dowload the needed files MAC_OSX_10.6_10.9.zip
- For Version 10.5 and 10.4 STOP and contact Centric Printer Support
- Centric Printer Support
- Email: jhsph@centricbiz.com
- Phone: 410-902-3310
- Open the Downloads Folder and select the Popup.dmg file you downloaded
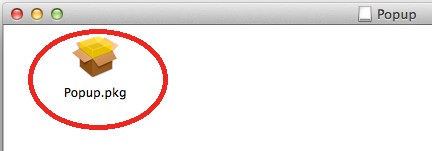
- Open "Popup.pkg"
- NOTE: If you receive the error warning "App can't be opened because it is from an unidentified developer"
- control-click the application and choose “Open”
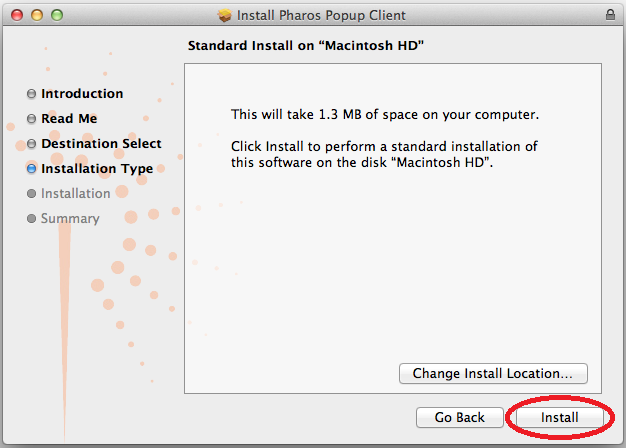
- Select Continue on the "Introduction" and "Read Me" dialogue windows
Select Install
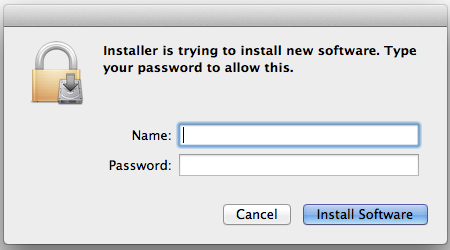
Provide Username and Password to local machine if prompted
- When the installation completes, click Close
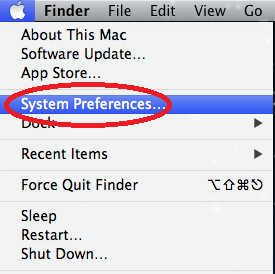
From the Apple icon select System Preferences
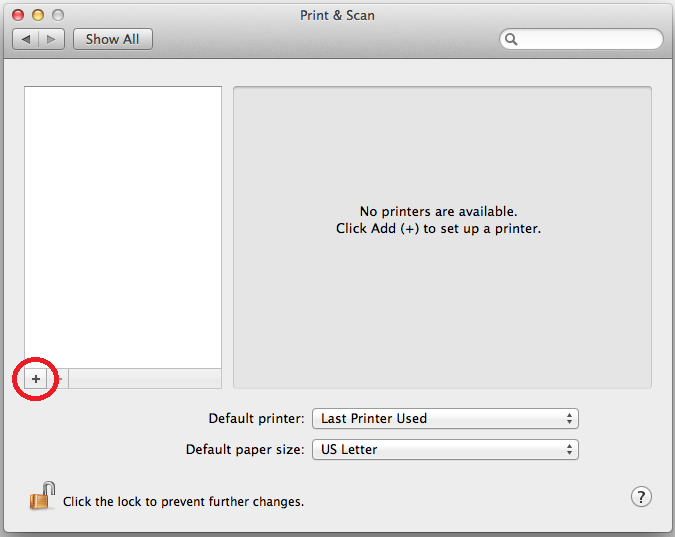
Select Print & Scan

- Select the “+” button to add new printer select Add Printer
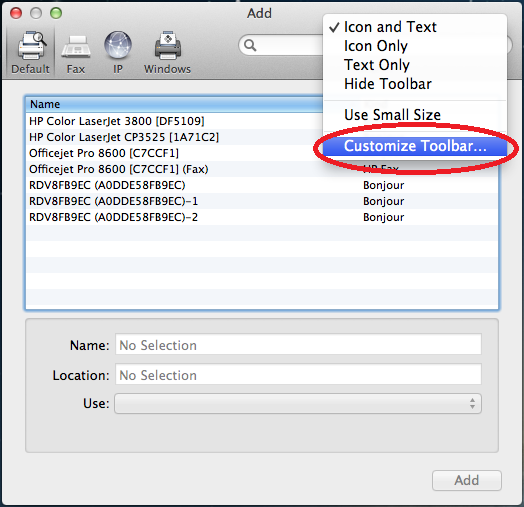
- Hold down the <Control> key on the keyboard as you click anywhere on the toolbar. A popup menu will appear where you will select Customize Toolbar
- Drag the Advanced icon to the toolbar and then select Done
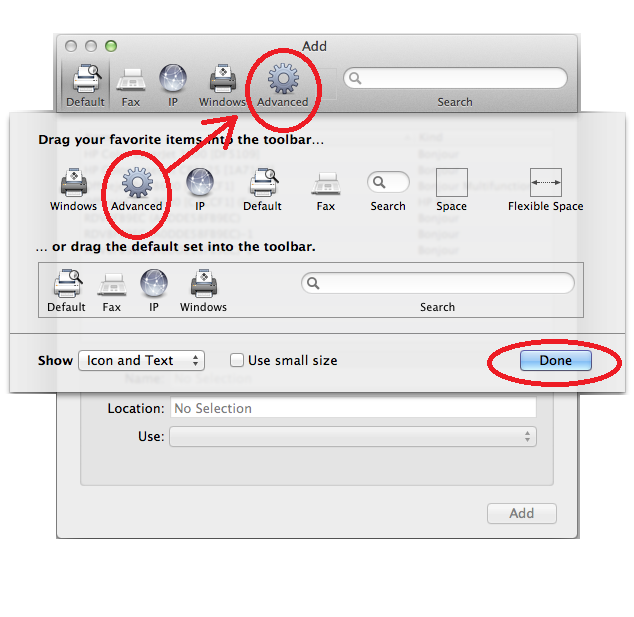
- Click on the Advanced icon
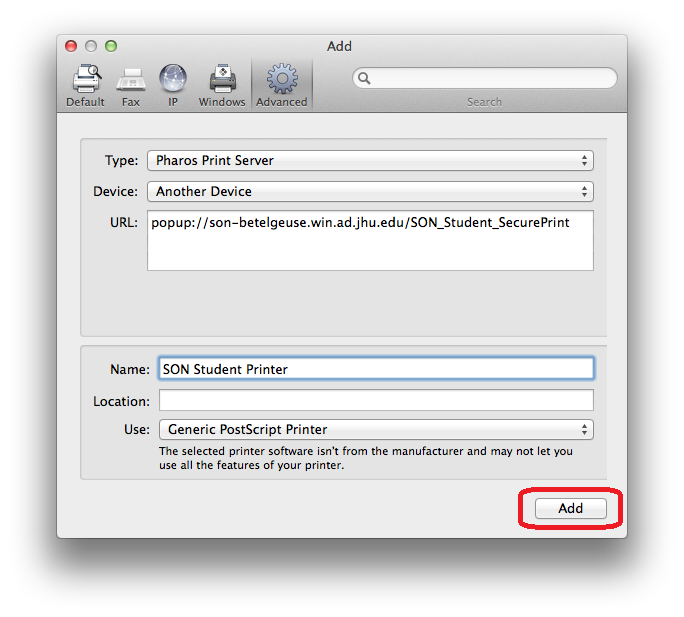
- In the Type: field, select Pharos Print Server
- In the URL: field, enter the following address exactly: Popup://son-betelgeuse.win.ad.jhu.edu/SON_Student_SecurePrint
- In the Name: field, enter SON Student Printer
- In the Use: field, select Generic PostScript Printer
- Finally, click the Add button
On the next screen, be sure to enable the Duplex Printing Unit option. Then click OK.
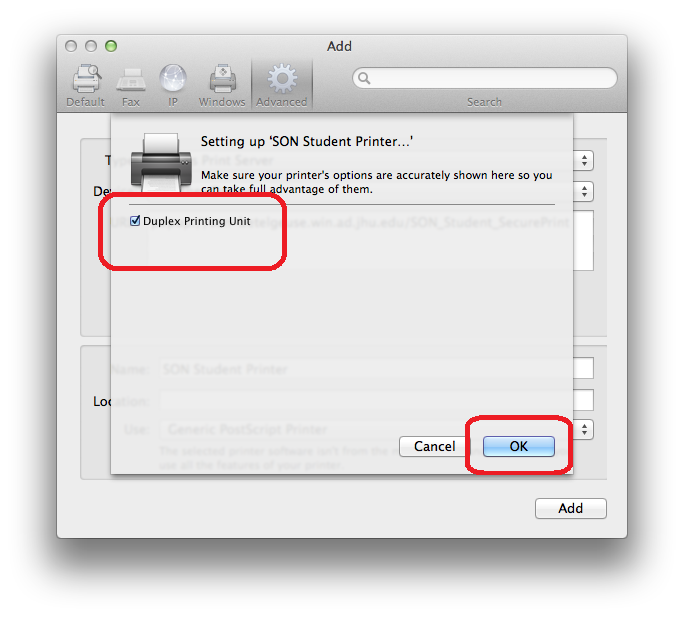
The printer called SON Student Printer has now been installed
Additionally, you must follow these steps to enable the "Print As Image" option in Adobe Acrobat for the "SON Student Printer" printer
Open a PDF
Choose Print
Select the "SON Student Printer" printer
Enable "Print As Image" in Advanced settings (see http://helpx.adobe.com/acrobat/kb/quick-fix-print-pdf-image.html)
- Send the job to the printer. Note you are not charged for print jobs that you do not release at the printer, but you must send the job to the printer for Adobe to save this setting for all future print jobs.
Instructions on how to print and retrieve print jobs can be found here: SON Student Printing Instructions